As an Admin, you can create a campaign (to send out an email) and choose to send on behalf of any, or all of the Users in your group.
You can also choose to send to all contacts for each User; or you can choose to send to specific Audiences or Tags, whether that be the same selection for all Users, or different for each.
To do this, start by navigating to the Campaigns menu and either create a new campaign, or select an existing campaign to modify it.* Once in the campaign builder:
Select Users to send on behalf of
In the Users module, select the "Add a User" dropdown to see your options:
- Choose either ALL Users;
- Or select specific Users from the dropdown (you can select multiple Users by selecting the dropdown again after making a selection).
Select recipients
Once your Users are selected, you can select the same recipients for all of them, or you can choose to customise the recipients by User.
Select the same recipients for all chosen Users
Go to the Recipients module.
Here you can either:
Select the toggle to set the All contacts option to ON (for all chosen Users);
OR leave the toggle off to select Audiences and Tags.
You can then select Audiences or Tags in two ways:
- If you know the exact name of the Tag or Audience you would like to choose, start typing it in the Search for Audiences or Tags box, then select the correct Audience or Tag from the matches shown beneath. *
- Add additional Audiences or Tags by repeating this step.
- Alternatively, you can select Browse (1), to see all available Audiences andTags.
Here you can select individual Tags or Audiences using the check boxes (scrolling through to subsequent pages at the bottom if required);
Or you can select all Tags or Audiences by ticking the select all box (2), and then de-select any individual segments you do not wish to target.
Select Apply once you have completed your selections.
* Ideally, any Audience or Tag should have consistent nomenclature for all Users, so that you don't have to select several similarly named Audiences/Tags.
If any of the selected Users do not have the chosen Tag/s or Audience/s, you will be alerted to this at the bottom of the module (Select the Edit by User link to confirm who this relates to).
Select different recipients for each User
Once your Users are selected, if you would like to select different Audiences or Tags for each of them, select the Edit By User link (3) in the Recipients module.
Within the subsequent settings:
- Select the toggle to set to All contacts for an individual User (4);
- OR, select the + Add Recipients link (5) beneath any User name to search for their Audiences or Tags.
- Start typing, then select the correct Audience or Tag from the matches beneath.
- Add additional Audiences or Tags by repeating this step.
- Repeat the process to personalise the Audiences for other selected Users.
- Select Apply
Within the Recipients module, you will now see that you have different recipients chosen for your selected Users.
Complete the campaign
Once you have selected your Users and their recipients, complete your campaign workflow by selecting when you would like the campaign to send (either through a Trigger, or a date and time), and which email you would like to attach to the campaign. More information on creating a campaign can be found here.
Most importantly, Save & Activate your campaign to schedule it on behalf of your Users.
* If you are modifying an existing campaign and its status is Scheduled or Running, you will need to click the Pause button first to make any changes: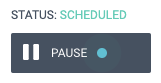
Comments
0 comments
Please sign in to leave a comment.